Volume Meter using the MicroBit

A project activity for Girls Into Coding
This session is designed to be fun! The idea is that we can follow it together in a class, but that we can also be free to move at our own pace. We’re going to be doing some basic python programming in this activity. You also have the opportunity to use the make code block based programming language. So whatever your level, you have lots of options!
The idea with this acitivity isn’t to become an ACE programmer inside 2 hours, but it’s just to get an appreciation of programming robots. So that you can use this knowledge for good in the future :)!
Contents
- Begin: Check you have the right equipment
- Activity 1: Let's boot up the microbit and check it is working
- Activity 2: How do we measure a sound?
- Activity 3: Let’s assemble our motor
- Activity 4: Let's make the motor move
- Activity 5: The definition of angles
- Activity 6: Creating a volume meter - step 1
- Activity 7: Creating a volume meter - step 2
Resources
Here's some resources that may help with the activity
Let’s begin
Begin
First lets check you have the right equipment, you should find the following items in your box
- 1 x Micro:bit
- 1 x USB cable
- 1 x Kitronik robotics board
- 1 x Battery pack
- 1 x Sound level indicator (wooden laser cut)
- 1 x Servo motor and stand
- 1 x Servo motor arm

About the Micro:bit
If you haven’t used one before then take a look at this video
Go to Microsoft MakeCode
- Plug your microbit into the computer using the supplied usb lead
- Browse to the website https://makecode.microbit.org/
- Click on New Project
- Name it ‘helloWorld’ or something else you choose
Tour of Microsoft MakeCode
- Simulator - on the left side of the screen, you will see a virtual micro:bit that will show what your program will look like running on a micro:bit. This is helpful for debugging, and instant feedback on program execution.
- Toolbox - in the middle of the screen, there are a number of different categories, each containing a number of blocks that can be dragged into the programming workspace on the right.
- Workspace - on the right side of the screen is the Programming Workspace where you will create your program. Programs are constructed by snapping blocks together in this area.

The features highlighted here are:
- Go to the Home Screen to start a new project or open an existing project
- Simulator shows what your program will look like when running on a micro:bit
- Hide or Show the simulator pane
- Program in either Blocks or JavaScript
- Programming Workspace where you will build you program
- Blocks Toolbox
- Download your program to the micro:bit
- Name your project and Save it on your computer
How to change the programming language (from python to blocks)
Note: in all of the following activities you can choose to use python or MakeCode blocks for programming the micro:bit. Choose whatever you feel is the right language for your level
How to download your code to your micro:bit
There are two options (explained on this page). If you don’t know - just ask a mentor
Let’s boot up the microbit and check it is working
Activity #1
Let’s write our first program
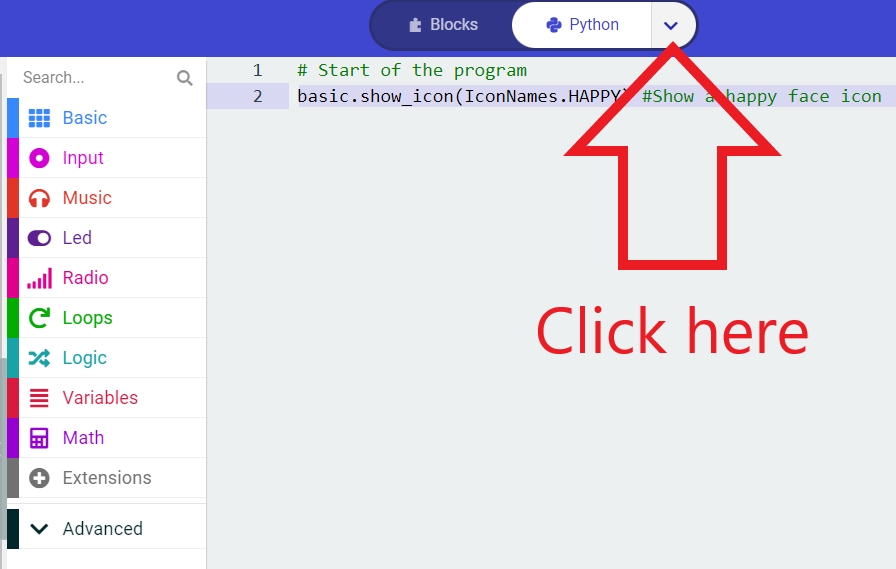
- You can select you programming language from the top of the page. To select python click on the dropdown and select python.
- Let’s write some code to make the microbit display a smiley face when the program starts
- When you have finished - download it to you micro:bit (follow the instructions here)
Let’s make the face change
- Microcontrollers work using a ‘forever loop’
- Let’s write a function to make the face switch between sad and happy in the forever loop
Let’s program a button input
- We can use buttons as inputs
- Let’s use the following to nake the face switch between happy and sad:
- Buttons
- An if statement
- A variable called ‘state’
How do we measure a sound?
Activity #2
Measure sound using the microbit
- Write the program below
- This uses serial communication to send the sound value the micro:bit measures back to the computer so that we can look at the value it on the computer screen. (We can imagine this like the microbit having a conversation with the computer)
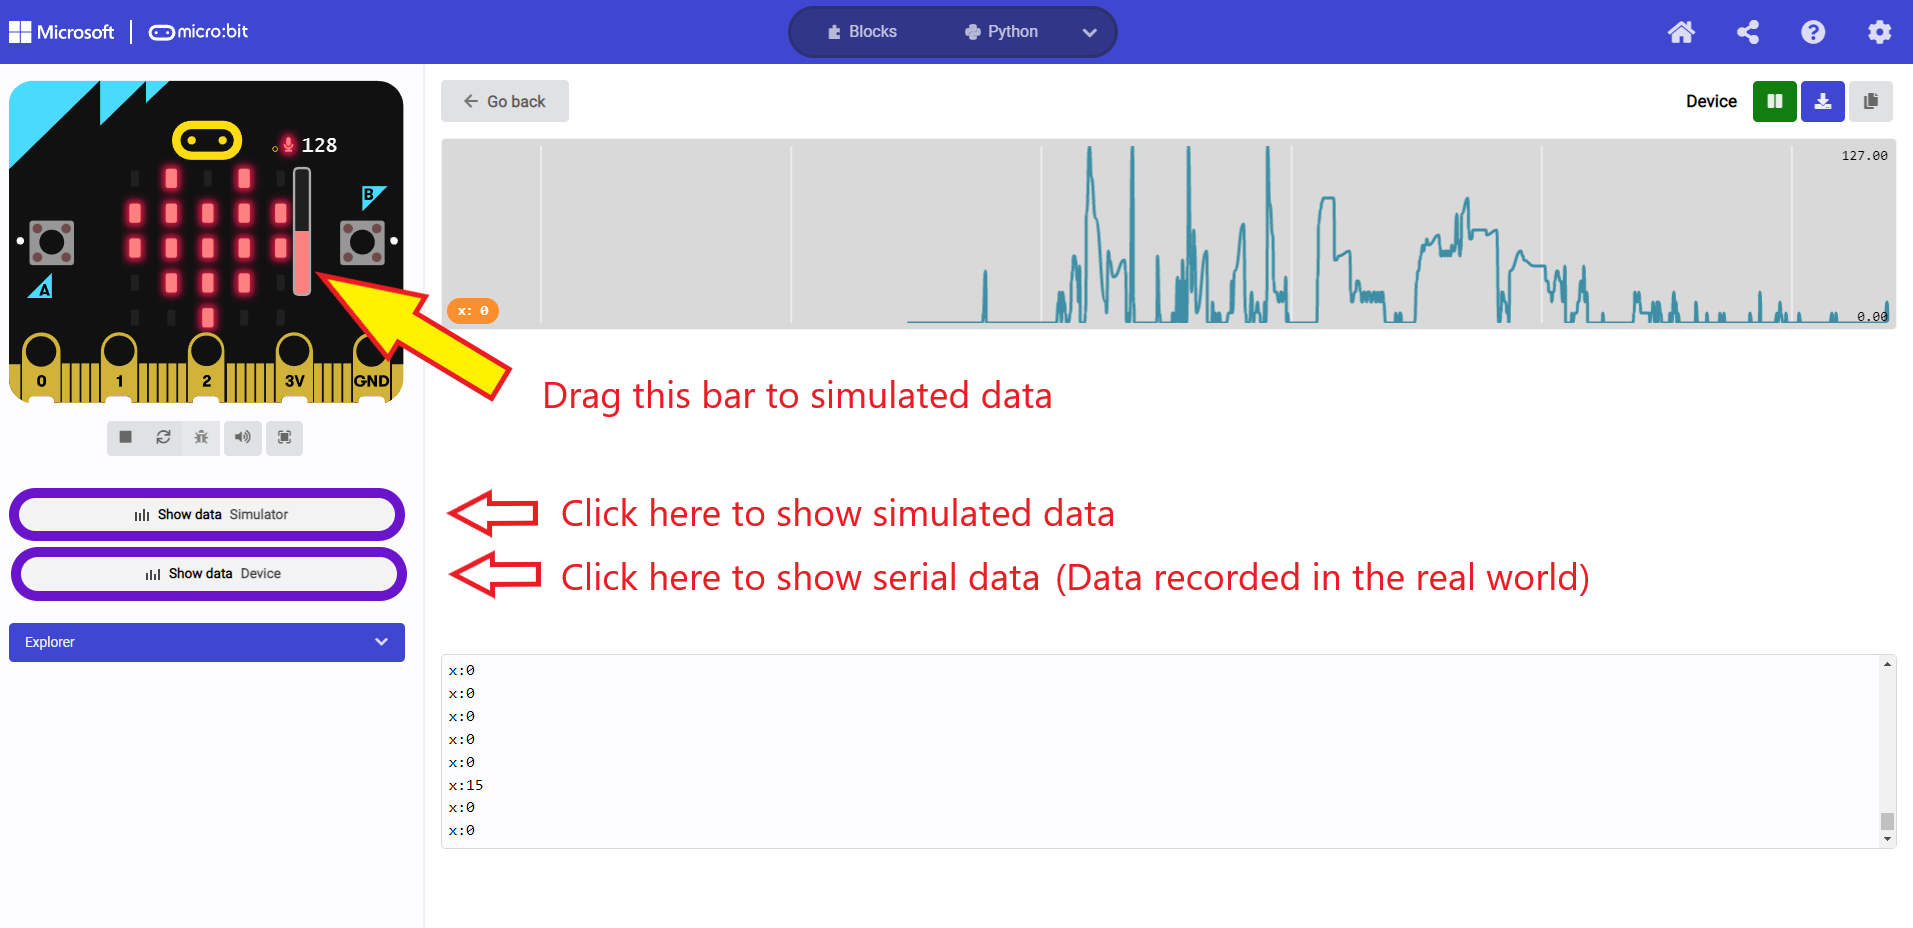
Now check the program works!
- There are some instructions in the image below
- Try it out in the simulator first
- Then try it out for real on your micro:bit
- Note you need to be connected to the micro:bit for this to work
- What sound values do you see in the simulation? in real life?
- What is the maximum? What is the minimum?
- In the simulation you should see a minimum of 0, and a maximum of 255
- In real life, the values seem to range from 0 to 131!
Now lets visualise the sound measurement on the micro:bit
- Write the program below
- This program allows us to plot a graph on the micro:bit leds to show how loud the sound is!
- If you’re interested, the documentation for the bar graph is here
- Check it is working correctly, you can check how it works in the simulator
Let’s assemble our motor and volume indicator
Activity #3


Add the number indicator. Great! You should now have the complete assembly ready

Let’s make the motor move
Activity #4
How is the motor moving?
This video shows how servo motors work! - If you’re interested it’s well worth a quick watch. (Maybe later on)
A simple program to make the motor move
- Write the program below
- We want to use the buttons to move the motor into different positions
- Download it to the micro:bit
- Check that the motor is moving correctly
- What do you observe?
- Which way is the motor rotating when you push the buttons?
- When you push the button for zero degrees it should move clockwise
- When you push the button for 180 degrees it should move anticlockwise
How angles are defined
Activity #5
The definition of angles is something that every roboticist shares! It’s important so that we can work together to communicate program things.
We define an anticlockwise rotation as a positive angle. And a clockwise rotation as a negative angle!

Have a play about with the animation of the robot arm below to get a feel for how this works.
See the Pen Robot arm (Joint Angles v1) by Ben (@benisme) on CodePen.
Creating a volume meter - step 1
Activity #6
To make the volume meter, we want to measure the sound, then tell the motor to move to a position. The louder the sound the more the motor can move. We can achieve this by dividing the maximum degrees the motor can move by the maximum volume level.
For example if the maximum sound level was 10, then the for each volume level the sound increased the motor should move by 180/10 = 18 degrees.
If the volume level is 5, then the motor should move by 180/10 * 5 = 90 degrees
Another way of saying this is the motor should move by volume_measured / maximum_volume * maximum_rotation.
For example if the volume level is 5, then the motor should move by 5/10 * 180 = 90 degrees
Let’s create a program to make this work!
- Copy the program below
- Make sure you understand how it is functioning
- If you have any questions, feel free to ask a mentor!
- You should now see your motor arm moving proportional to the volume of the sound recorded
Creating a volume meter - step 2
Activity #7
So our motor is now moving with sound volume! But you may have noticed that the indicator arm is moving in the wrong direction relative to the numbers! So we need to reverse the direction. How do we do that?
Challenge!: Try and reverse the direction yourself without looking at the code below.
- We need to somehow minus the value we want to move from it’s maximum angle (180 degrees)
More challenges
Activity #8
You’ve finished the main activity! Well done.
If you’ve got this far, then here’s some additional challenges to keep you busy
- Get creative -> make some kind of indicator to attach to the end of the volume meter
- Change the function of the buttons, when you hold button A&B together they should move the motor to 90 degrees
- Change the display. The display should show faces that get more angry as the sound gets louder
- Change what the motor is measuring. Use acceleration instead of sound