Introduction
Aims
In this part of the activity we will:
- Connect all our parts together
- Assemble the volume indicator system
Learning outcomes
| Learning outcome | |
|---|---|
| Screws | Use a screwdriver |
| Mechatronics | Connect a motor to a motor driver |
| Mechatronics | Connect a power source to a motor driver |
Preperation
Tools required
| Tool | Quantity |
|---|---|
| Screwdriver (Philips and flat) | 1 |
Equipment required
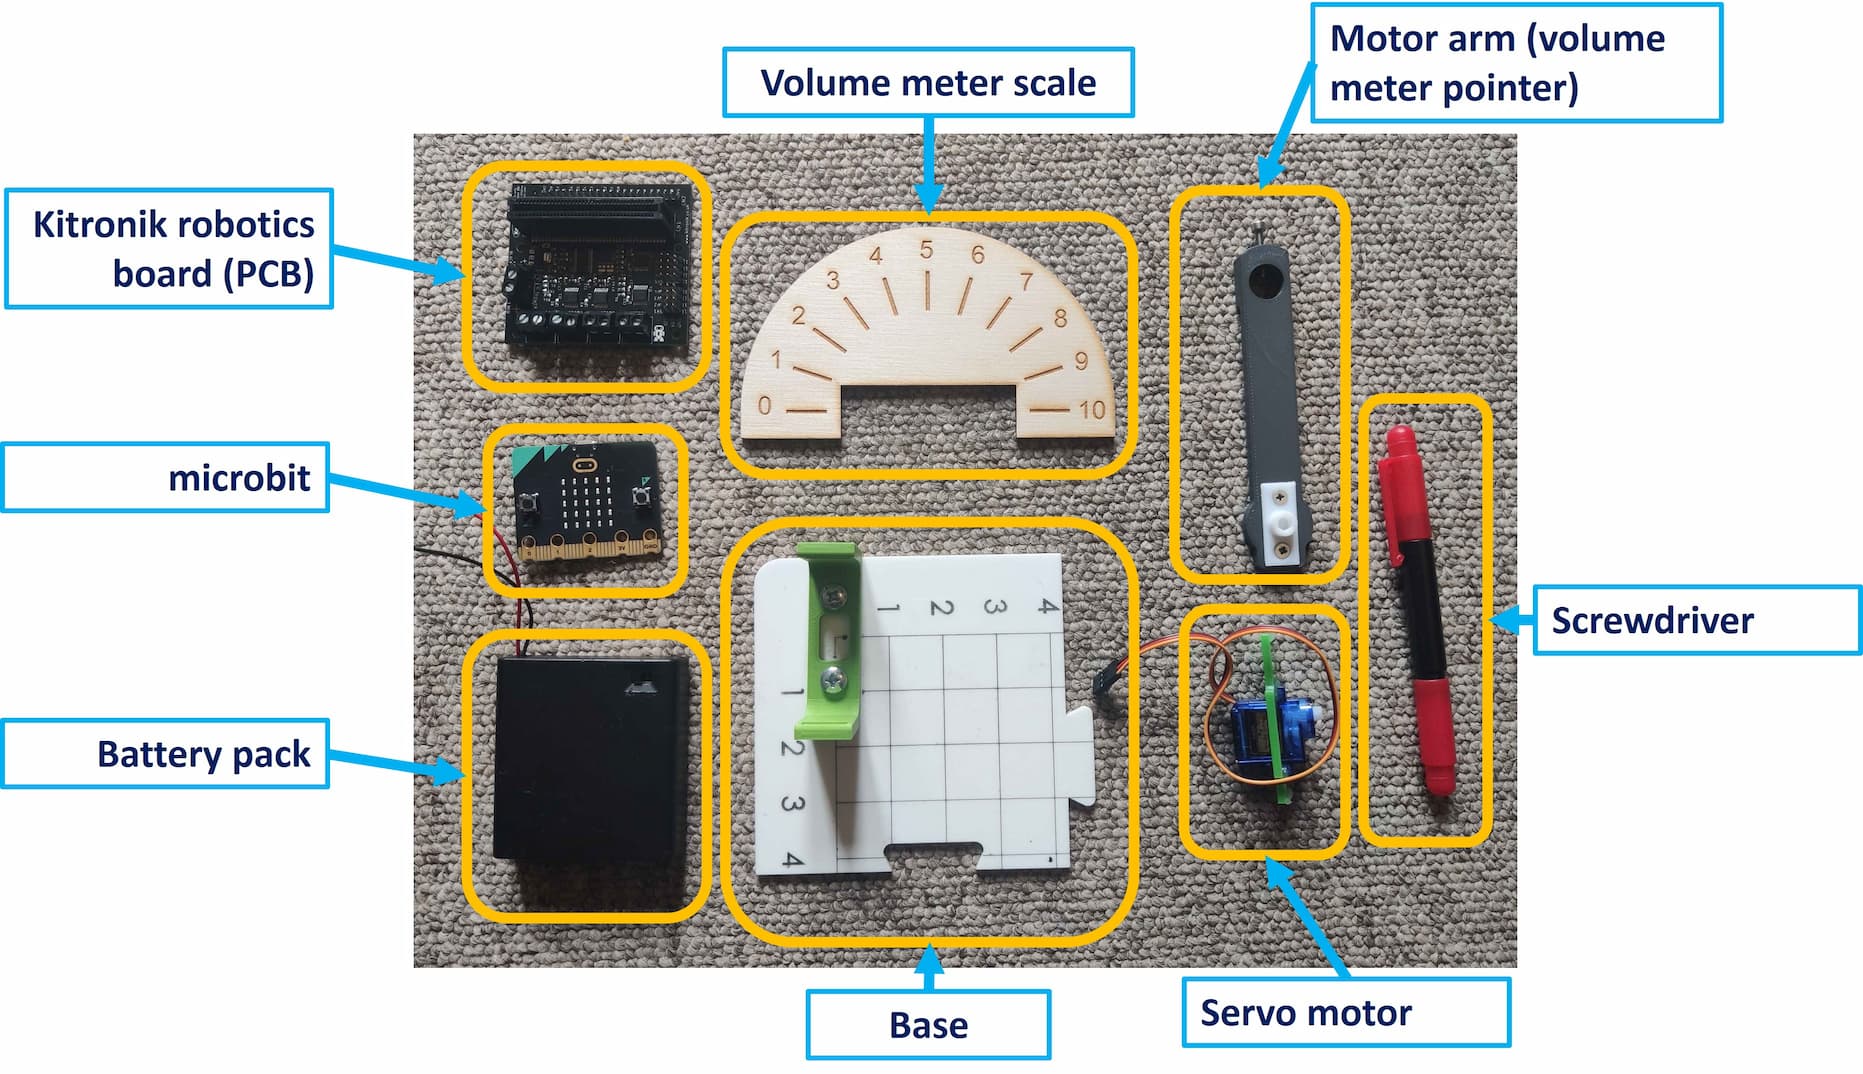
| Equipment item | Quantity |
|---|---|
| Micro:bit | 1 |
| USB cable | 1 |
| Kitronik robotics board | 1 |
| Battery pack | 1 |
| Volume meter scale (laser cut) | 1 |
| Servo motor and stand | 1 |
| Servo motor arm | 1 |
Activity
Mount the motor
Put the motor into the holder
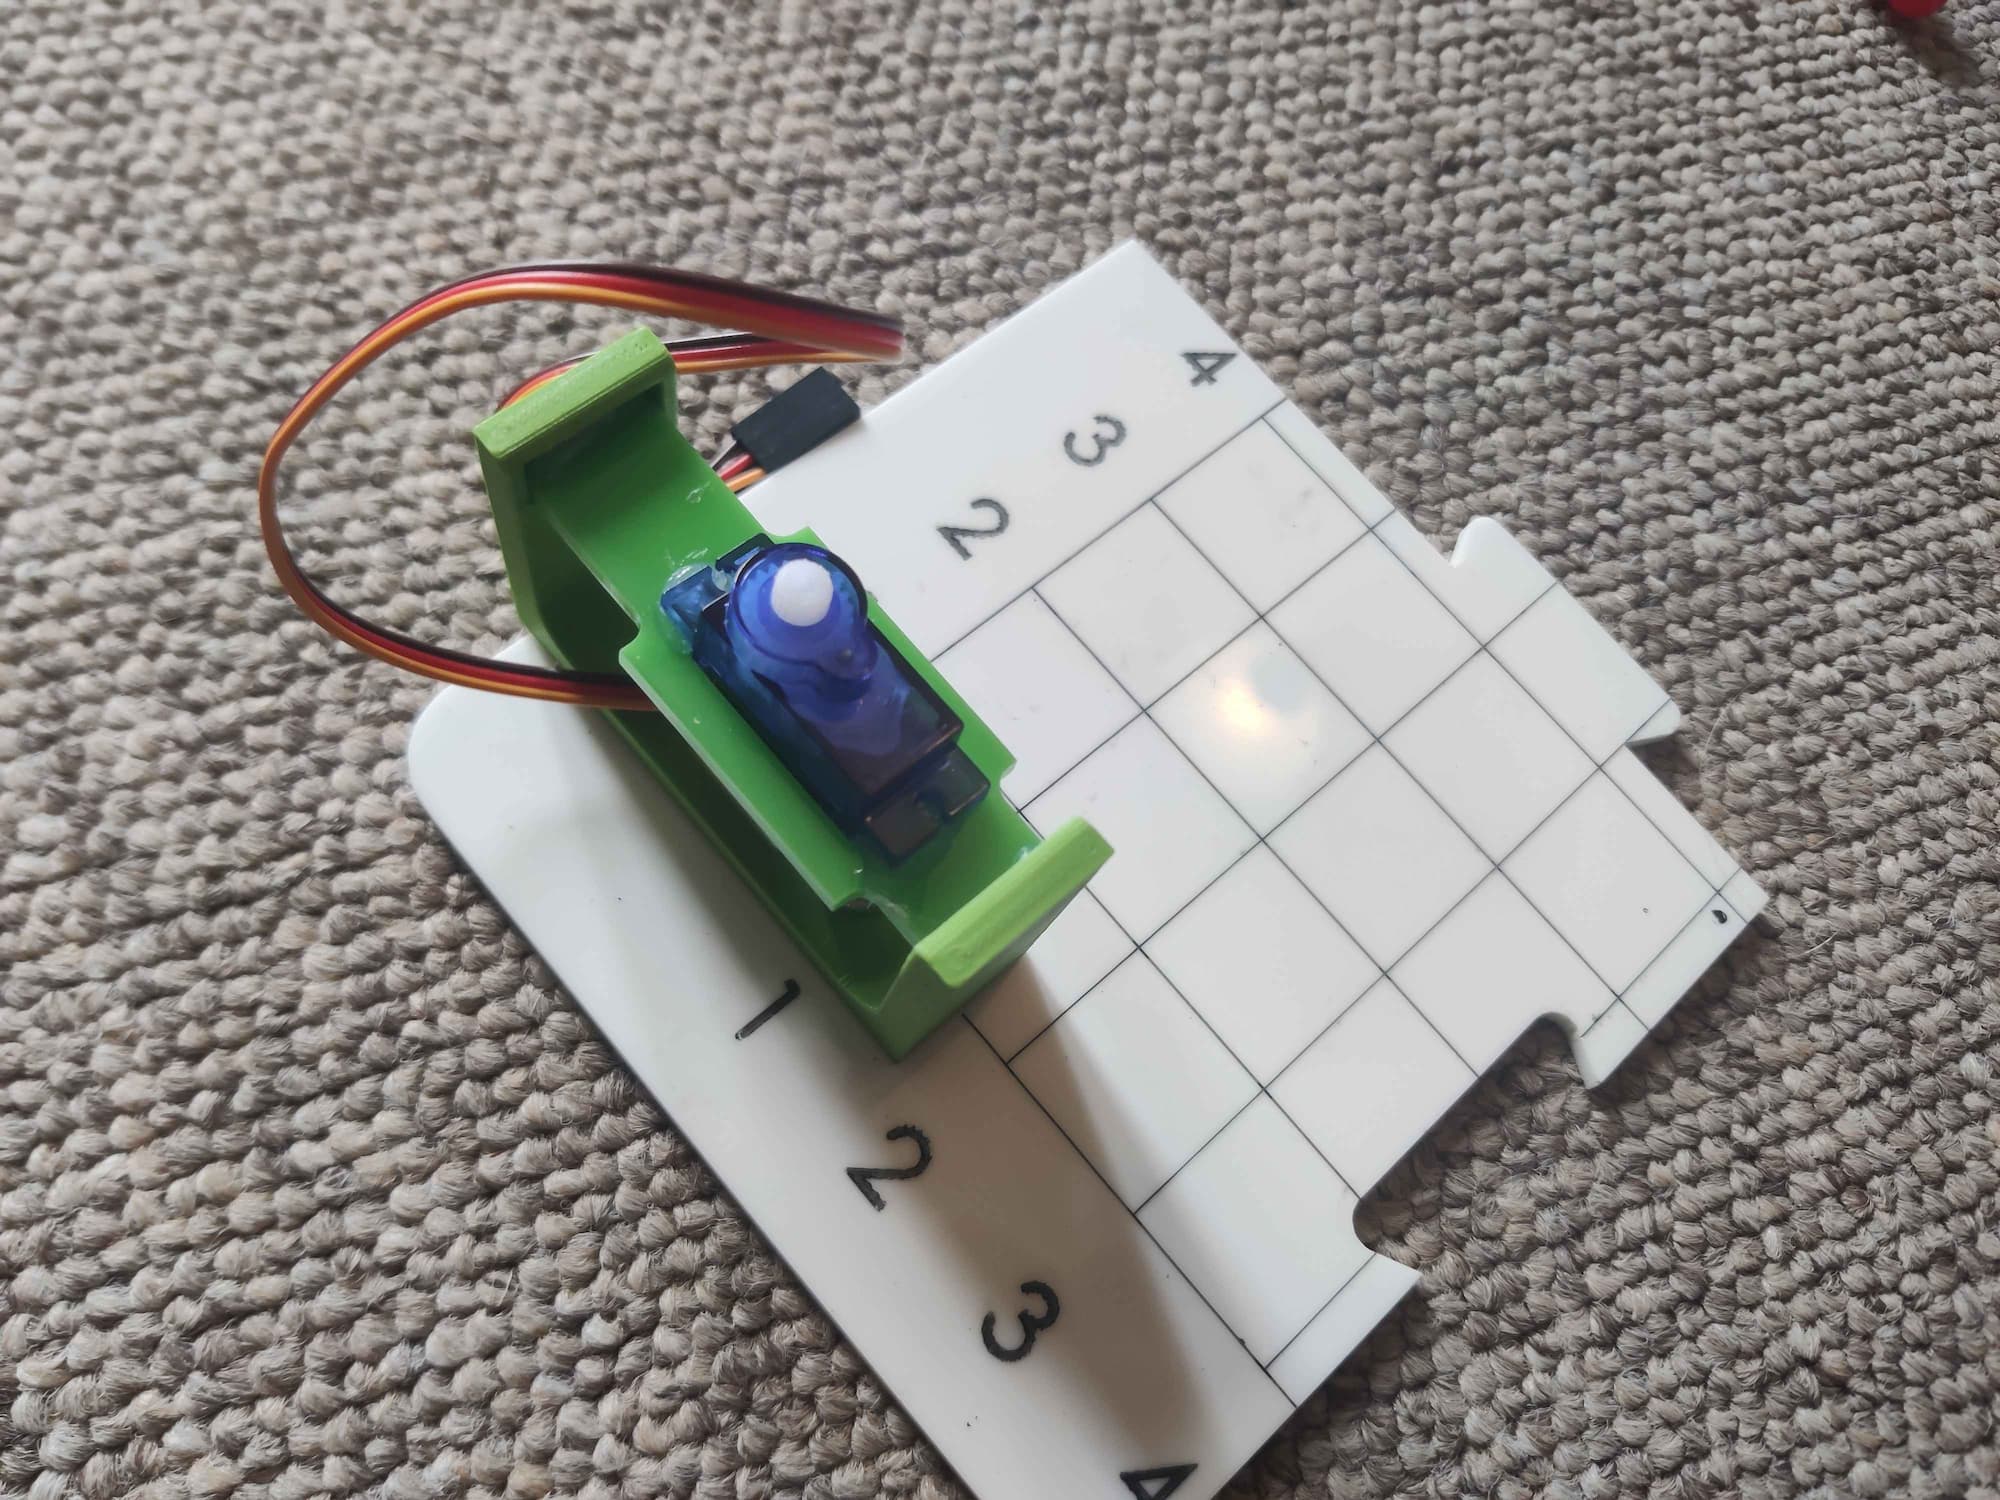
Attach the volume indicator arm

Put the microbit into the kitronik_robotics_board
Make sure it is the right way round!

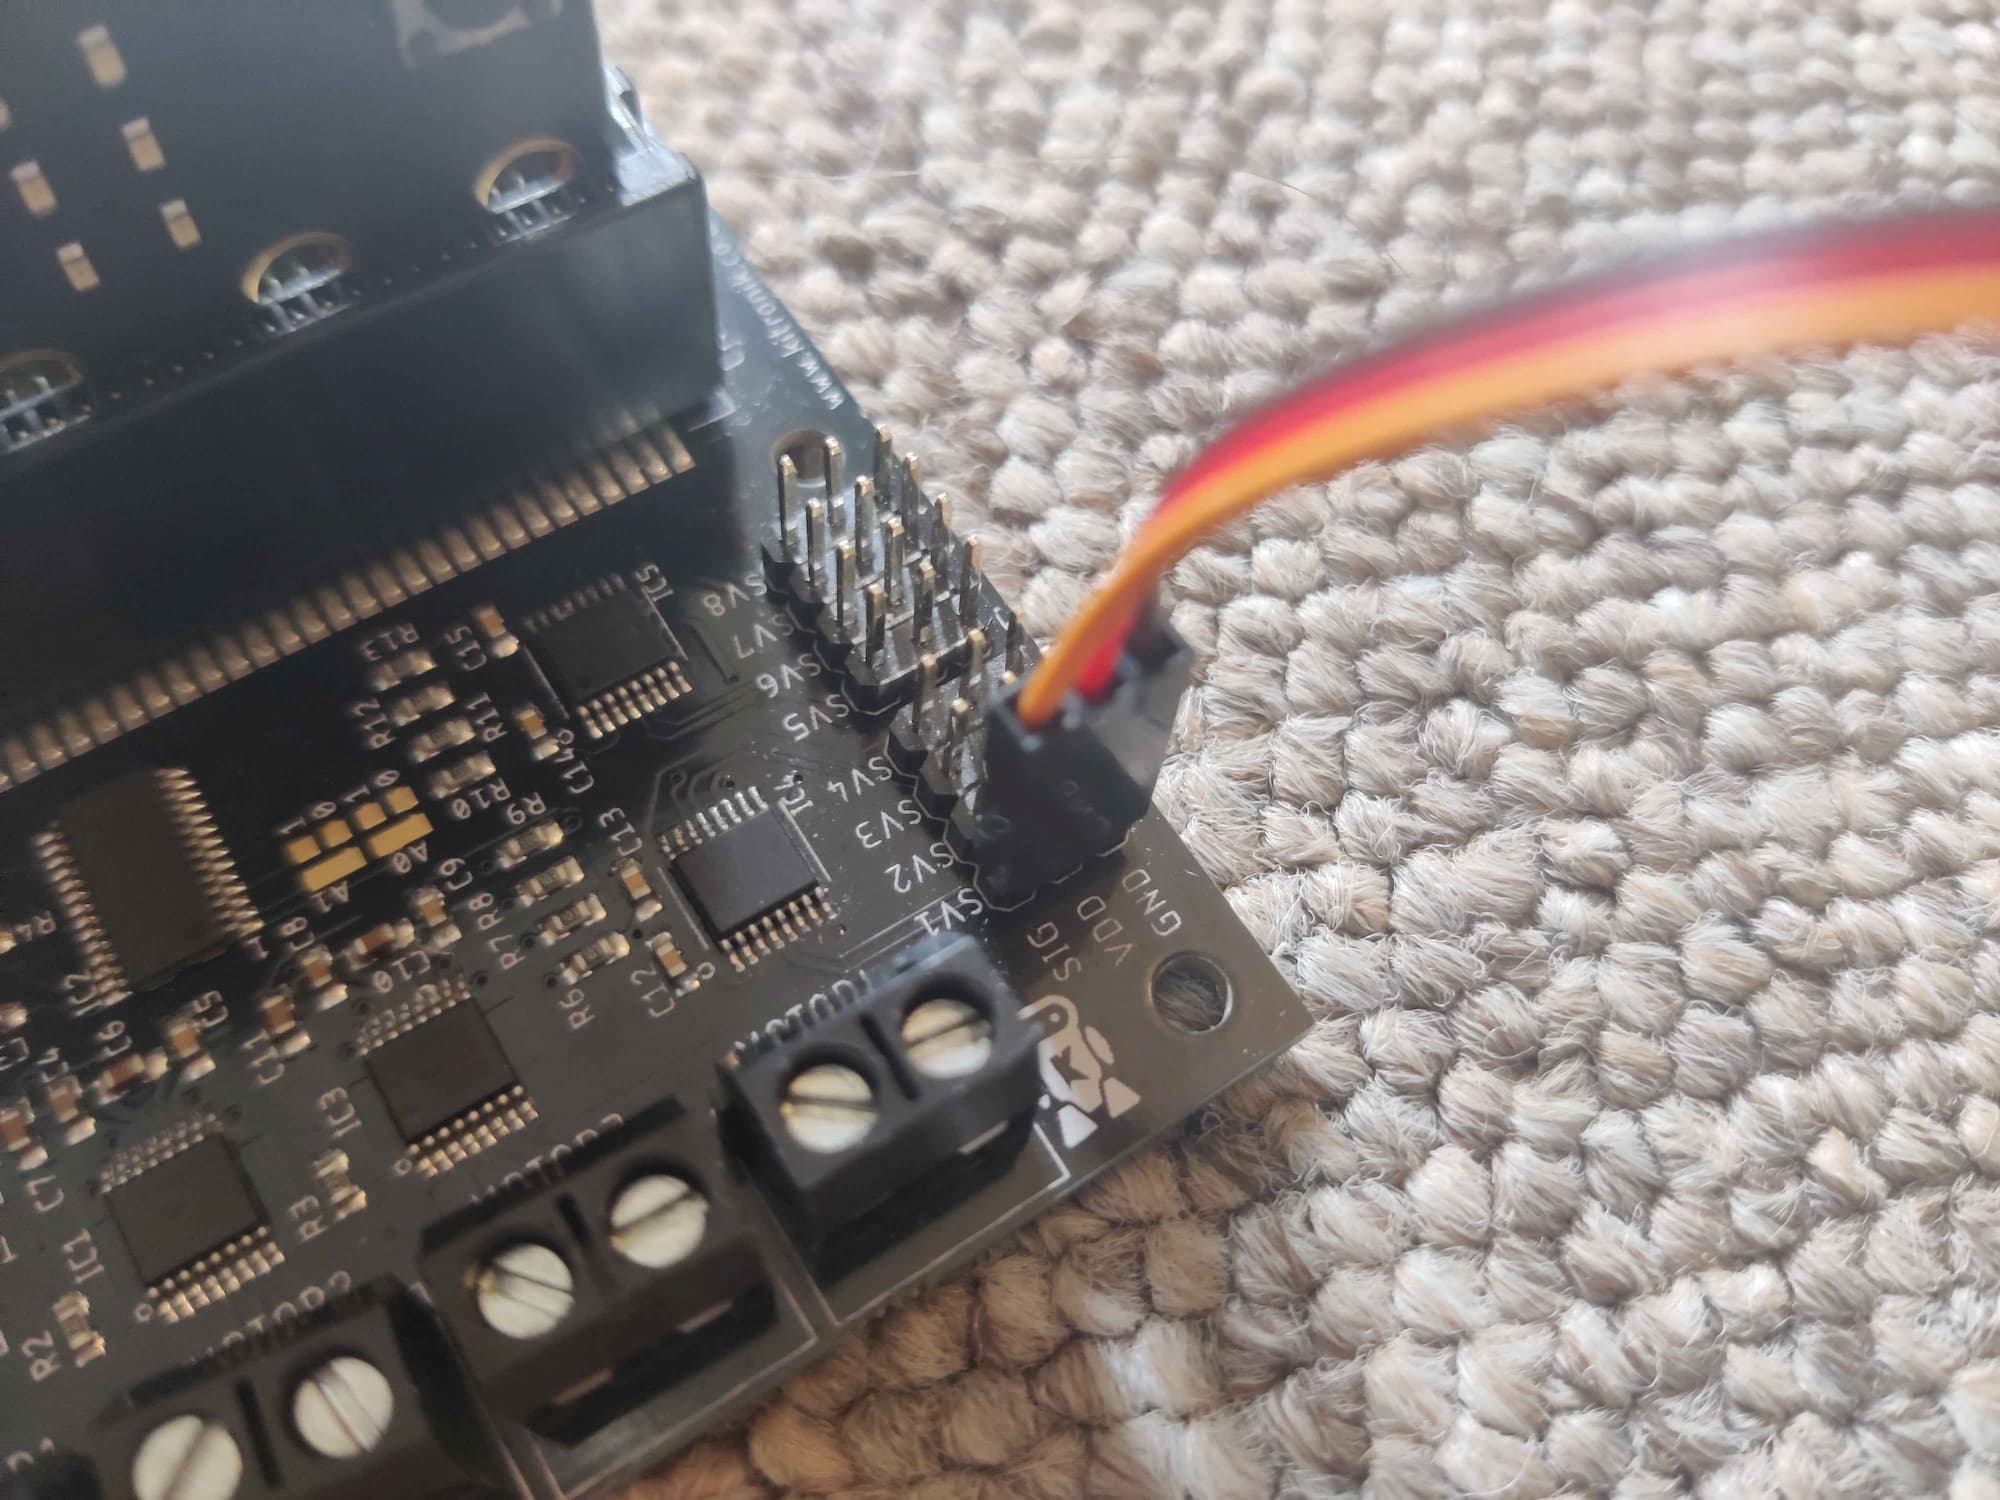
Plug the motor into the robotics board
Make sure it is plugged into servo slot #1
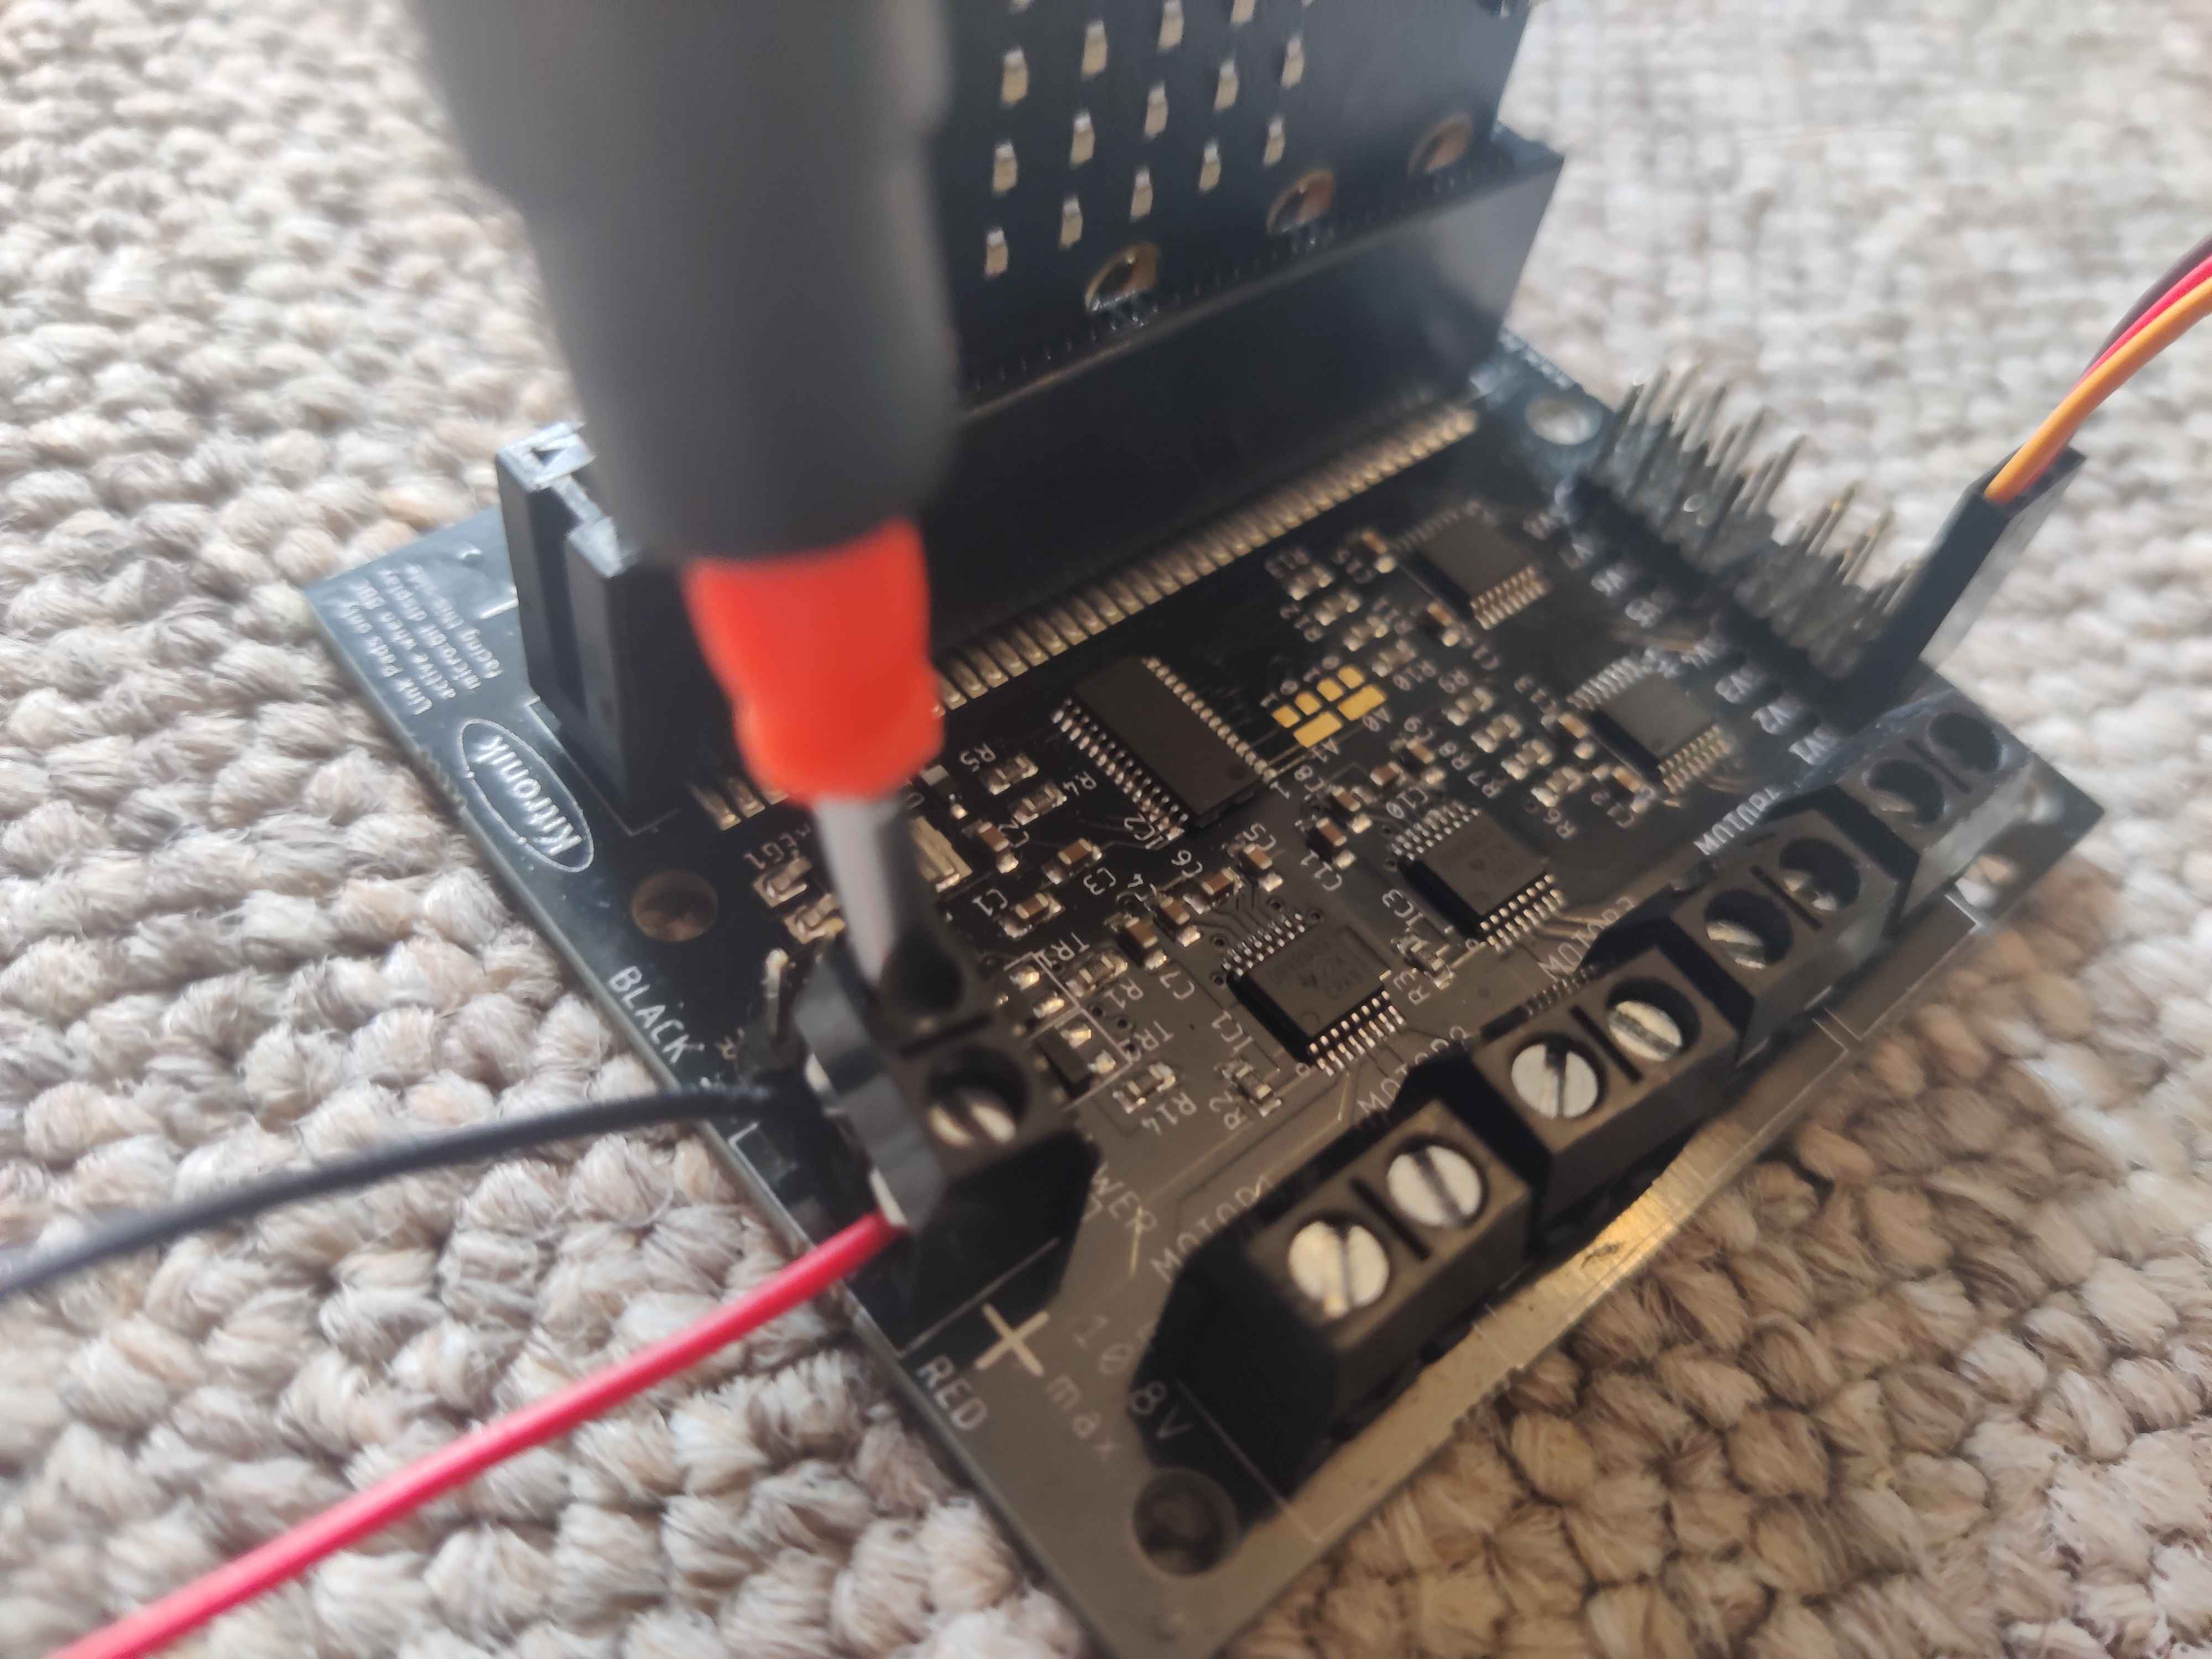
Attach the battery
Attach the battery, make sure the negative and positive leads are the right way around!
Add the volume meter scale. Great! You should now have the complete assembly ready
